This article outlines how to create a membership that is used as a QR code to be scanned for entry to multiple events, and entitles the holder to a specific seat for all events.
- When to use this type of membership card
- How to create a membership ticket with seating plan
- How does the customer book a ticket to an event with their membership card
1. In which case should this type of card be created
This type of membership card (digital or printed) allows cardholders to re-use a unique QR code as their tickets for all events that are included.
The customer will not need to book tickets before every event and can simply show their membership cards at the entrance.
This type of membership card is specifically for events at a venue with a set seating plan. The cardholder will choose a seat when they purchase the membership card and this seat will be assigned to them for the entire season/validity period of the card.
This type of membership card is for recurring events that are hosted at the same venue/location. It is NOT suitable for events which take place in multiple locations, or venues without seating plans.
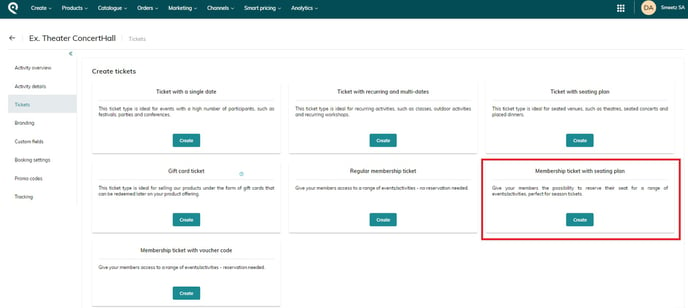
2. How to create a membership ticket with a seating plan
To allow your customers to purchase a membership allowing access to, let's say 10 events, you need to:
- create a seating plan
- create a membership product
- add 10 tickets in your membership product and link them to the seating plan.
2.1 Create a seating plan
Visit your Smeetz account, and follow the steps below:
- Contact support@smeetz.com to get access to the website where you can create a seating plan.
- Create the seating plan and event: Follow the steps in this article: Create your personalised seating plan
- Determine the number of events you would like to include per season with the membership card. Every single event created on the seating plan creator equals an event the membership cardholder has access.
2.2 Create a membership product with one ticket per event
- Create an activity/product: Go to Create (in your account) > Activities
- Create or select an existing activity/product > Tickets > "create ticket" > Membership ticket with seating plan > click "create"
- Complete the requested information fields:
- Ticket name and description: this will be displayed online to your customers
- Category
- Online/Internal availability: you can set the sorting order for where this ticket type appears on the list, among your other tickets, for better visibility for your customers (O = top, 50 = bottom)
- Seating plan: select the correct seating plan
- Select the purchase period for the start and the end date/time for sale of the membership
- Start validity: set the start of validity for the membership ticket to be used
- End validity:
- To create an annual pass: select "Should be valid for a defined number of periods" > Period length "yearly"
- To set an expiry date: select “Should be valid until” and enter a specific date whereby the card will no longer grant entry to any events.
- Guest usage and reservation: number of people that the membership cardholder can bring with them as a guest to each event
- Renewal: set yes/no to auto-renewal and after how many days of non-payment the membership will be cancelled.
- Complete the categories: add the seating categories on your seating plan (e.g. VIP, Stalls, Balcony, etc)
- Category name displayed to user: the category name that customers will see when they book
- Category name defined on seating plan: insert the name of the category displayed on the seating plan creator. It must be written exactly the same, or the system will not be able to link the seating plan to the ticket.
- Category
- Sales collection
- Online and internal availability
- Prices: add the prices for the categories and complete a description
- Select the charge flow and confirmation: this indicates when the customer will be charged
- Ticket scanning: select "Multiple scans" and determine the amount of scans that are included in the category of seating plan (if they have access to 10 events, then 10 ticket scans should be selected).
6. Save and Make the ticket available for sale: Product > Activity Details > Published > Ticket status: "On"
3. How does the customer book a ticket
When a customer wishes to purchase their membership, they can choose a seat on the seating plan. This seat will be reserved for them at each event included in the membership.
Once a customer has bought their membership ticket, they will receive a confirmation email with a QR code. This code will be scanned for entry at each event the customer attends.
4. See other types of membership cards
- Membership cards - General Information
- Membership cards - Multiple entry without seating plan
- Membership cards - Multiple entry with variable seat