This article explains in detail how to create your personalised seating plan. Your customers will be able to choose their seat directly when booking their ticket.
We need to provide you with access to our seating plan creation software.
- Login to the seat designer software using the login and password we provide (if you don't have them, ask for them at support@smeetz.com).
- Click on New sitting chart, at the top left of your screen.
- Choose between 2 types of seating charts:
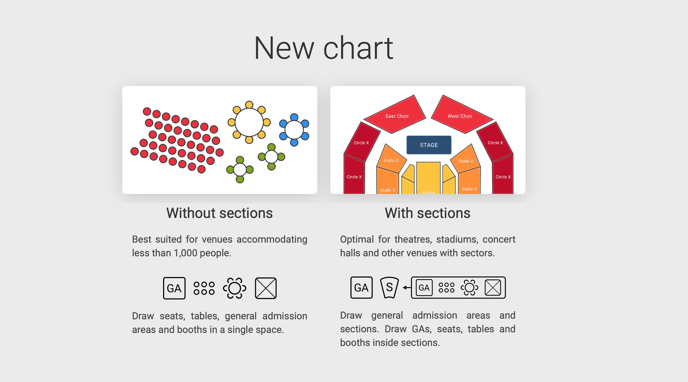
- The seating plan without sections (left) is mainly suitable for events with less than 1000 people.
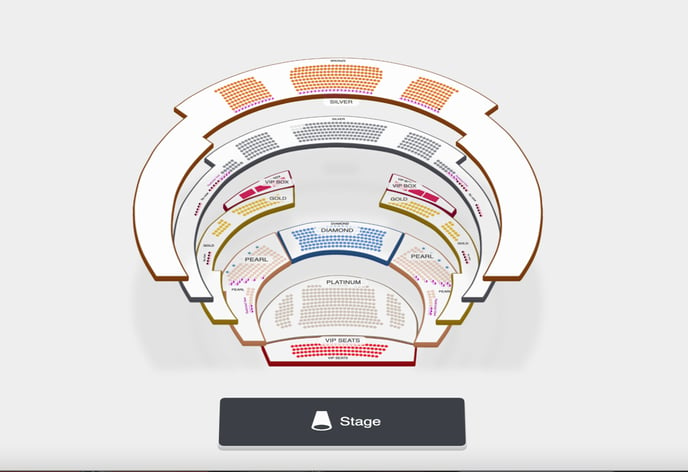
- The seating plan with sections (right) is suitable for large events requiring different areas (e.g. stadiums, concert halls, ...).
- A page will then appear to allow you to add a room plan template.
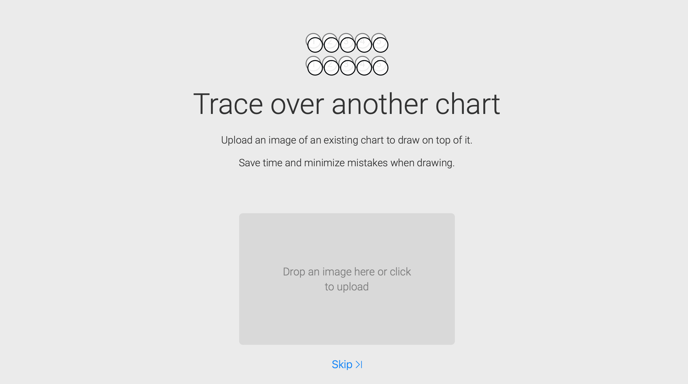
If you have an image or photo of your seating plan, you can download it to use as a template. It's not mandatory.
- Creation of your seating plan without sections
- Creation of your seating plan with sections
- How to integrate your seating plan with your tickets (on app.smeetz.com)
1. Creation of your seating plan without sections
Step 1: Only if you have uploaded your seating plan as a template.
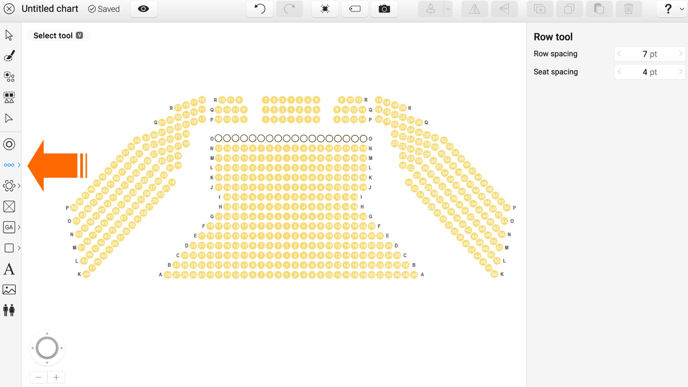
- You will then have to determine the space between seats and between rows
- Insert the rows using the row tool on the left bar
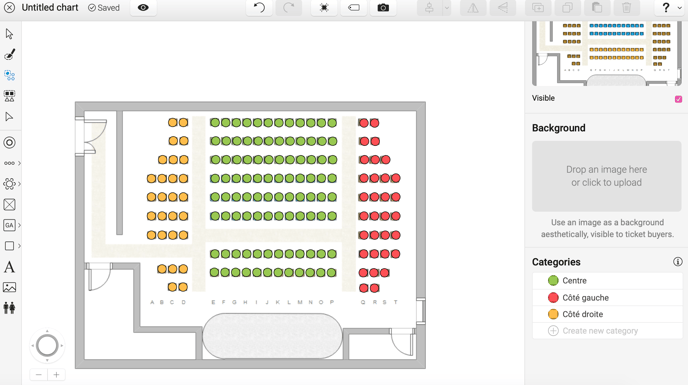
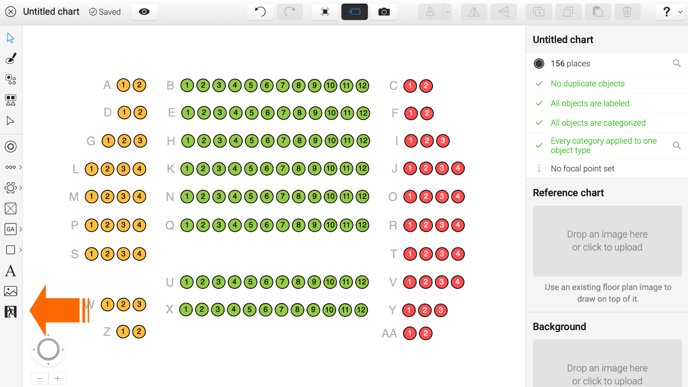
- Once you have created all your seats, you can assign them to different categories (ex: Balconies, center, sides, ...) using the categories section, at the bottom of the right bar.
- You then need to define the seat and row numbers, under the label

- On the right panel, uncheck the "Visible" box of your model in order to have a preview of your plan
- If you wish, you can add symbols to inform your customers about emergency exits, stairs or other personalized details.
- It is possible to block certain seats (e.g. 1 seat out of 2). For this, you need click on
 at the top of your screen.
- Select one by one the seats to be "blocked" then check the box "disabled by social distancing rules":
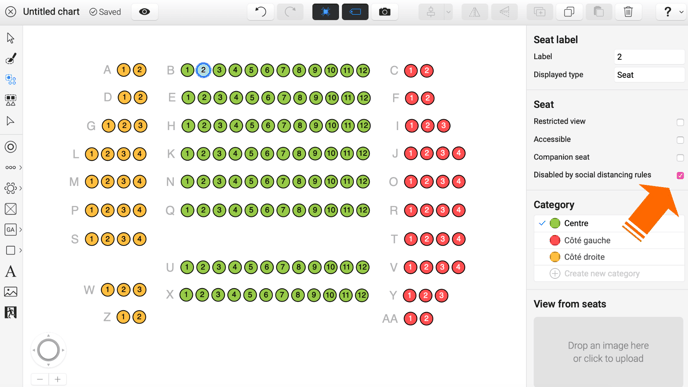
- The seats in question cannot be reserved and you will therefore comply with the safety standards imposed on you.
- Select one by one the seats to be "blocked" then check the box "disabled by social distancing rules":
2. Creation of your seating plan with sections
You can copy and paste sections of similar size to duplicate them
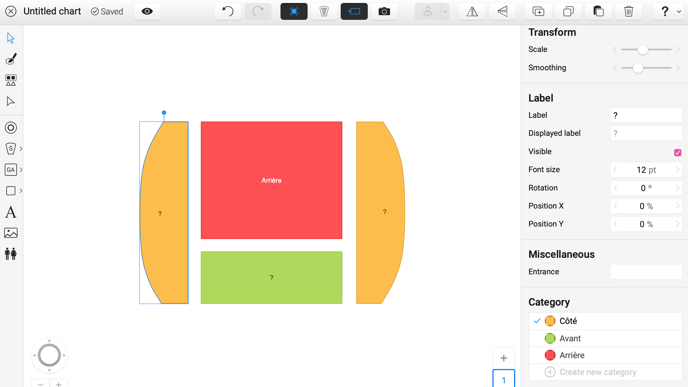
- Create your sections
- Then follow the procedure described above from Point 2.
- To insert the seats in the sections, click on the Edit contents section. By clicking on the section, you will be able to name it (under label) and colour it (under category).
3. How to create a seating chart with multiple floors
Section-based charts can have subsequent floors created after the first one is drawn.
In order to create a new floor:
-
Create a new section-based chart, or load an existing section-based chart
-
Start drawing the first floor
-
Once you are done, click the + (plus) button on the floor picker at the bottom right corner of the canvas, to add a new floor
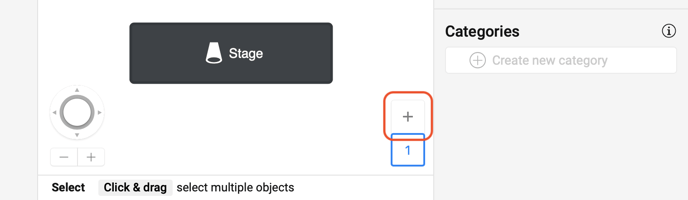
Every time you begin drawing on a new floor, the + (plus) button will become available again, all the way up to nine floors
Converting existing charts to multiple floors
If you are converting an existing floor plan where each floor is a separate section, simply add a floor, then copy/paste the relevant section into that floor, and delete it from the initial floor where you copied it from. You may need to readjust the sections/floors to ensure a good end-user view, which you can check by clicking on the "Preview" button at the top left of the page.
4. Integrate your seating plan with your tickets
- Once you have completed your seating plan, click on Seating charts at the top of your screen.
- Click on + Create event, next to the map you want to add to your tickets.
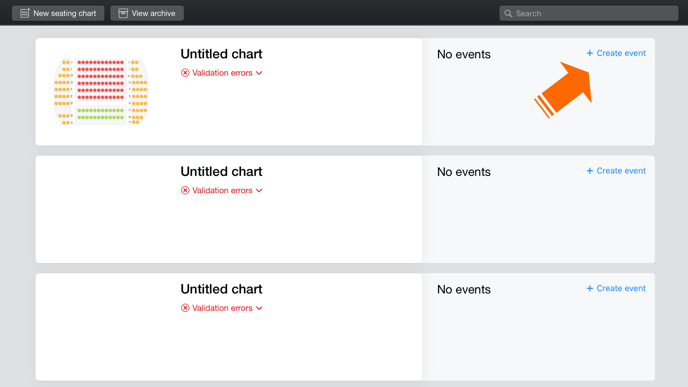
You need to create an event for each product. If your event takes place every night, you will need to create an event for each night and therefore have a key for each ticket.
3. Rename your keys so that they don't get mixed up, by clicking Edit key. For example, we
advise you to add the date of the event at the beginning of the key, as in the picture below: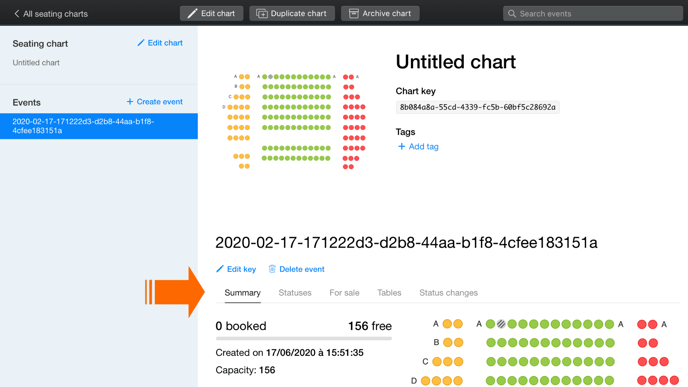
4. Login to your Smeetz account
5. Go to Tickets > Create a ticket > Ticket with seating plan
6. Fill in the various information and enter the key you copied under the "Event Key" section.
At the time of booking, your client will have the possibility to choose their seat number: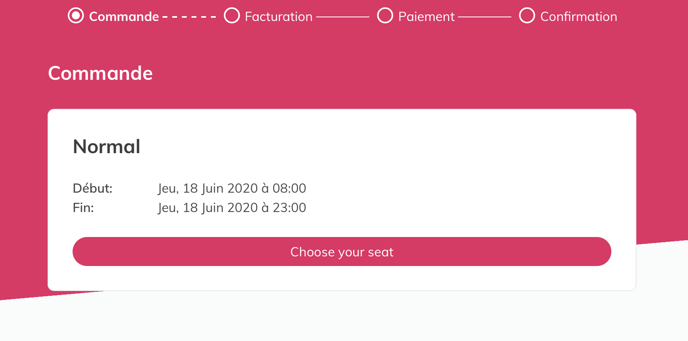
Changing your seating plan once your sales have started is at your own risk.
You can, however, log in and block/unblock certain seats.