Discover the basics of our point of sale (POS) system in this article, covering its functionalities and implementation considerations.
Once on the POS homepage, you can access 5 main tabs:- Homepage
- Customers tab
- Products tab
- Orders tab
- Analytics tab
- Cashier Report tab
- Occupancy calendar tab
Important to know
- To use the POS you need to be on an Android device.
- Google Chrome is the web browser that offers the best performance.
- Note that if you need to print tickets and/or receipts, you will need the POS App. Printing is not available from a web browser.
1. Homepage
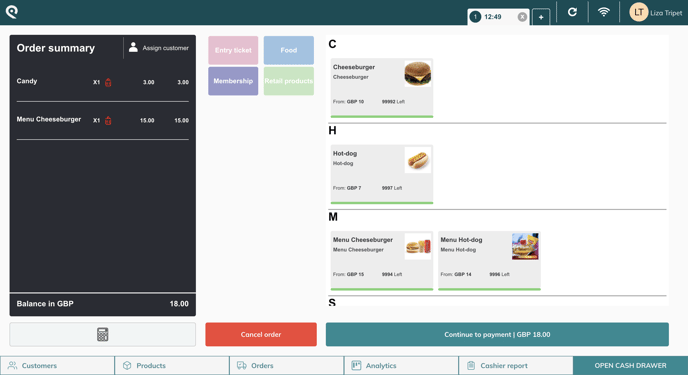
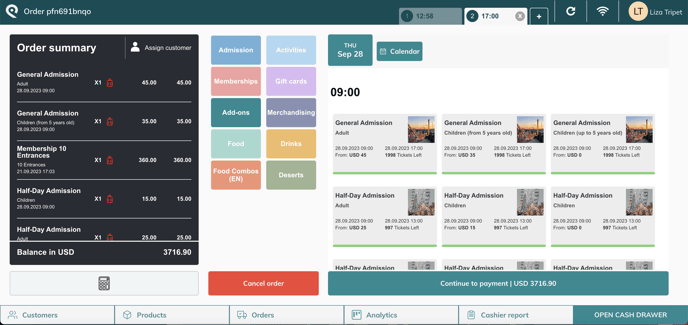
The homepage is the page that your sellers will use to sell your products onsite. It is split into 3 sections:
- The order summary on the left
- The sales collections in the middle (these menus contain tickets or retail products that have been configured beforehand) (more info on how to create sales collections)
- The tickets/prices on the right
-png.png?width=688&height=349&name=6%20(1)-png.png)
4.1 Process a sale
Once a sale has started, you select the products by clicking on them on the right and they will appear in the order summary (which works like a basket).
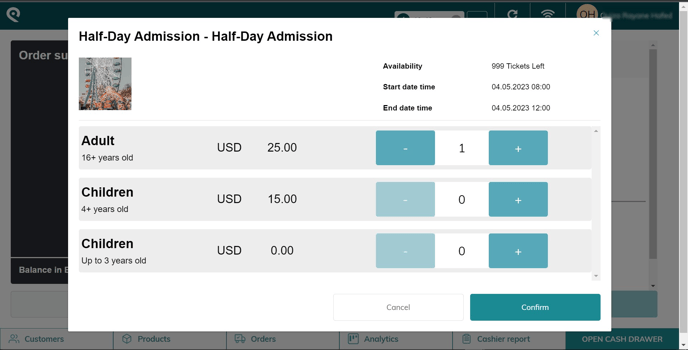
Depending on your setup, the tickets can show one price only per box or open a pop-up so that you can select the price and quantity after clicking on the ticket. Just click on the Confirm button to add the ticket/item to the basket and continue the sales.
Then, you proceed to the "Payment" step to complete the sale.
Read this article to process a simple sale on the POS
1.2 Manage multiple orders
You have the option to create multiple orders simultaneously. This allows you to return to orders that are pending before payment and order closure. You can access them from the navigation bar. The hour is the time at which the sale has started.

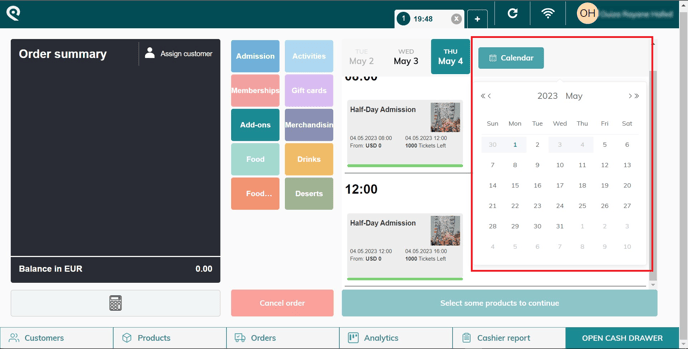
1.3 Calendar views
Depending on your ticket type, you have multiple view options. If your ticket has timeslots, by clicking on the calendar button, you can get the tickets only for a selected day.
2. Customers tab
Click on the "Customers" tab to easily manage your customers.![]()

- You can create new customers
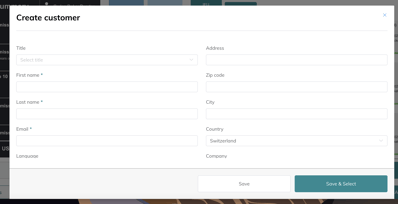
- You can edit existing customers by clicking on the pencil next to the customer
- You can select a customer to assign it to the current sale you are doing by clicking on "select"
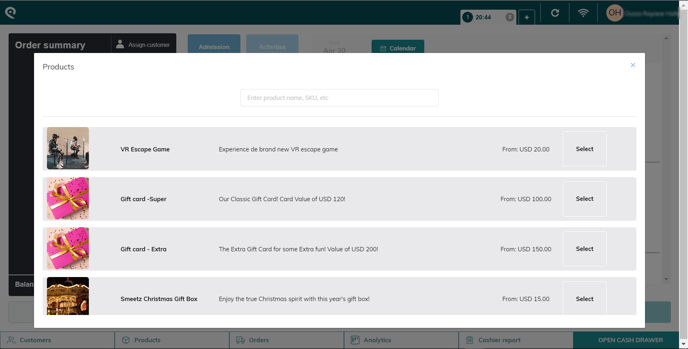
Explore your entire product range with just a click on the "Products" tab.
You will be able to select products here to add them to the basket.
4. Orders tab
Click on “Orders” and you will get a full overview of all orders made.![]()
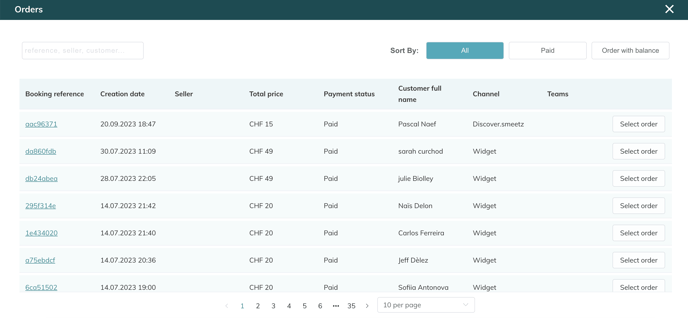
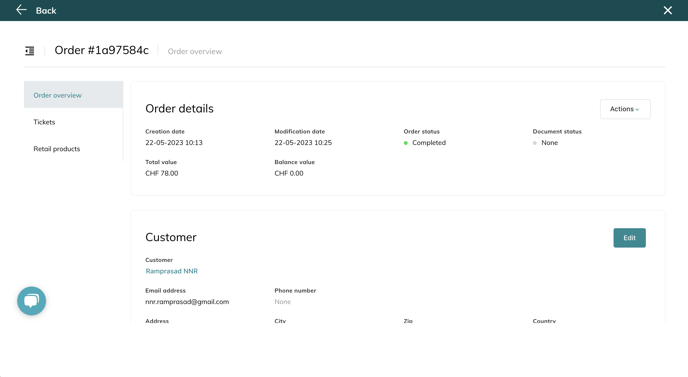
- If you click on the Booking reference (on the left), you will be directed to the order overview of that specific booking (as in the back-office).
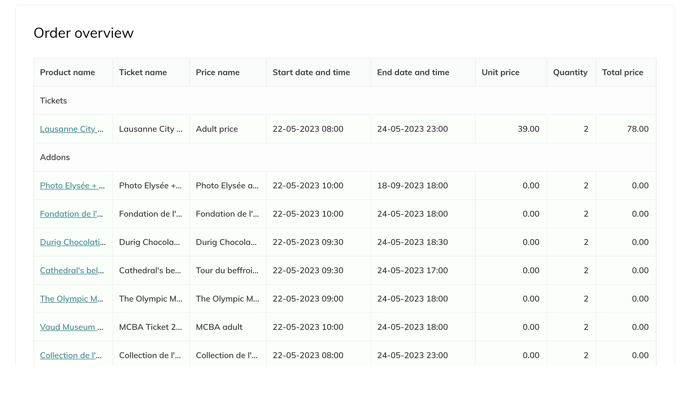
- If you click on "select order" (on the right), you will be redirected to the POS homepage with the selected booking open to make modifications.
Read this article to Cancel and refund an order on the POS
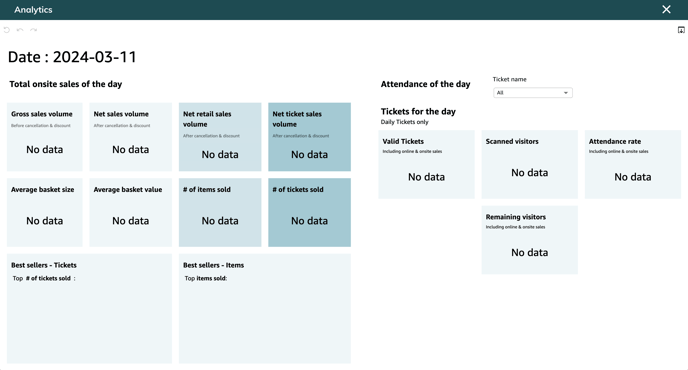
5. Analytics tab
From the “Analytics” tab you will be able to access a simple POS report withs stats from the day. ![]()
- from the sales volume (ticket and retail)
- to the average basket size
- including best sellers
- and attendance of the day
6. Cashier report tab
From the “Cashier report” tab you will be able to access sales that happened on the POS during a certain period.![]()
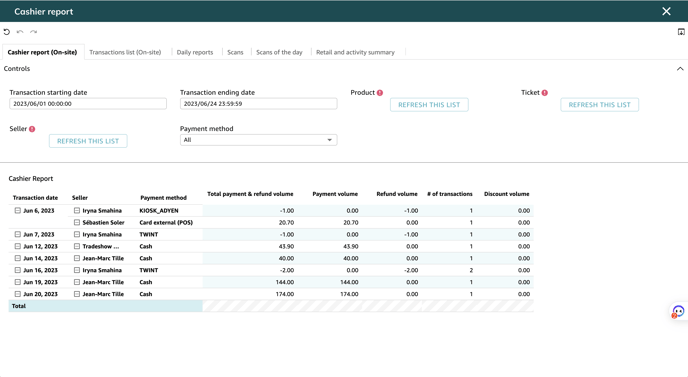
Read this article to understand the cashier report.
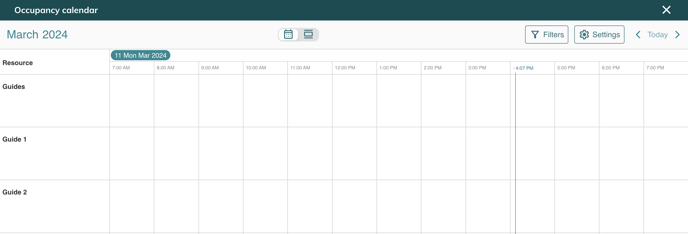
7. Occupancy calendar tab
From the “Occupancy calendar” tab you will be able to access the bookings made for specific resources.