This article outlines how to process a sale, quote or invoice for your customers directly from the Smeetz back-office.
- Internal sales from the back-office
- How to create an order in the back-office
- How to create a quote/invoice in the back-office
1. Internal sales from the back-office
The "Create a Sale" page allows you to make reservations/bookings via the Smeetz back-office.
In that section, you are able to:
-
Create an order (mostly for your regular attendees)
- For example, if a customer is calling you and would like to buy a ticket but is unable (or unwilling) to book or pay online, you can take the reservation from the office.
- You can make sales via all the payment methods or allow a balance to be paid later on at-the-door.
-
Create a quote or a direct invoice (for your business customers)
- For example if you have a school visit and need to first send a quote, which becomes an invoice once approved by the school.
Create a sale VS the point of sale
- The back-office/internal sales are designed to make reservations, edit bookings and manage large groups.
- The Point of sale App is designed to sell at-the-door to walk-in customers.
2. How to create an order in the back-office
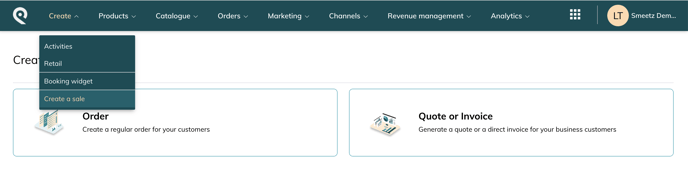
Login to your Smeetz account, click "Create" tab > "Create a sale" > "Order"
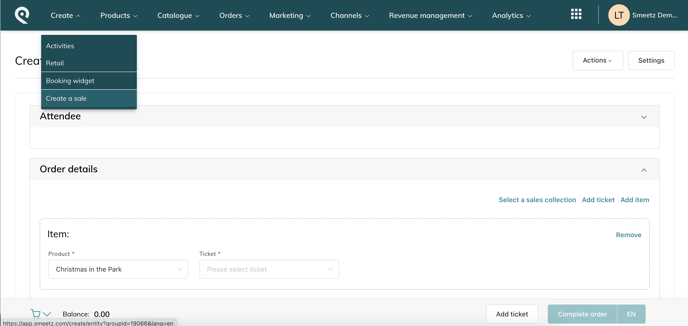
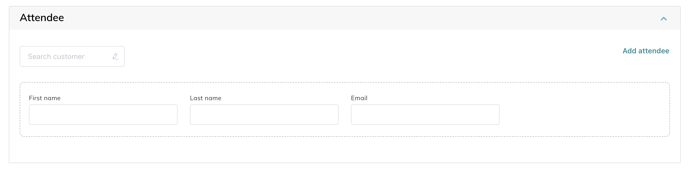
2.1. Attendee section
- You can add personal information for every attendee, but this is optional
- You can either select an existing customer or add data to create new ones
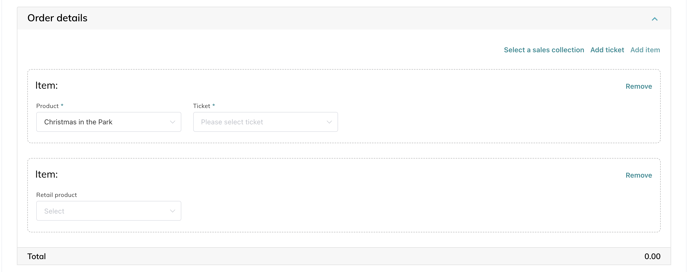
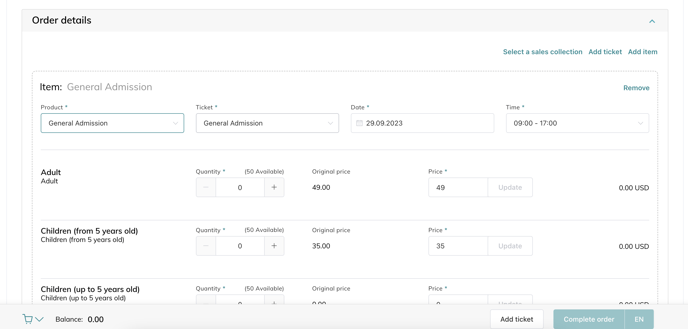
2.2 Order details section
-
On the top right, click on "add ticket" to select activity products or "add item" to select retail products
-
For activities
-
Select the product that you wish to book
-
Select the ticket with the correct date and time
- If you have a ticket with seating plan you choose a seat
- Then, select the quantity of each tickets category
-
-
- Below each attendee will be the custom fields you have preselected for each ticket holder.
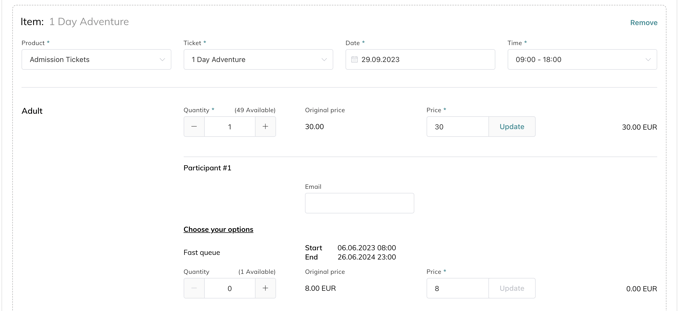
- Add-ons, under "choose your options", can be chosen for each attendee if they have been created and associated with the ticket (how to create add-ons).
- Below each attendee will be the custom fields you have preselected for each ticket holder.
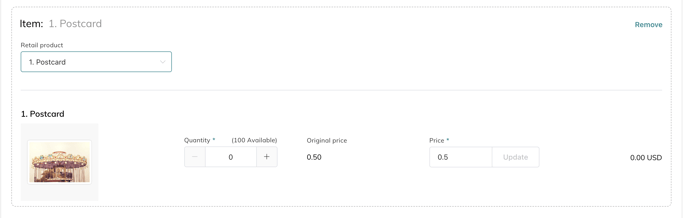
- For retail products
- Just select the quantity
- Just select the quantity
- Once the quantity of each item is selected, you may change the price if you wish > click on update.
You also have the capability to create a sale that groups together several products/activities at the same time. To add a ticket, simply click on "Add ticket/item"
2.3 Booking information section
If you have set up custom fields at the booking level (e.g. name, phone number, address) you will then enter those details (if you do not have custom fields already set up and would like to capture additional customer data, please follow the steps here: Set up custom fields).
You can search for a customer to fill out those data faster

2.4 Discounts and gift cards section
You can add a promo code or a gift card/voucher, if the customer has one to redeem.
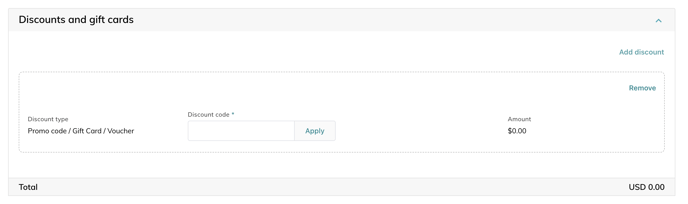
- Select "Add discount"
- Insert the code in the field "Discount Code" then click "Apply".
- If the code is valid, the discount will automatically be applied
You can apply further discounts by selecting "Add discount"
2.5 Payments section
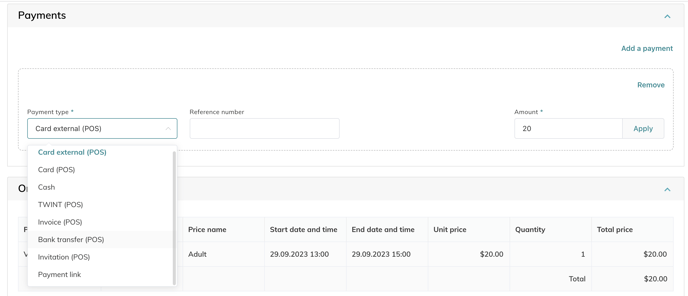
- First choose a payment type from
- Card external (POS): When transactions are recorded, but payment made through an external provider
- Card (POS): When payments are processed through Smeetz and Adyen. Select the payment terminal
- Cash: Cash transactions are recorded
- TWINT (POS): TWINT transactions are recorded
- Invoice (POS): Invoice transactions are recorded. You will need to reconciliate payments with your bank
- Bank transfer (POS): Bank transfer transactions are recorded. You will need to reconciliate payments with your bank
- Invitation (POS)
A customer can use more than one payment method for one order (e.g. 50% by card and 50% in cash). To do so, you just need to "Add" a payment and ensure the amounts are correct.
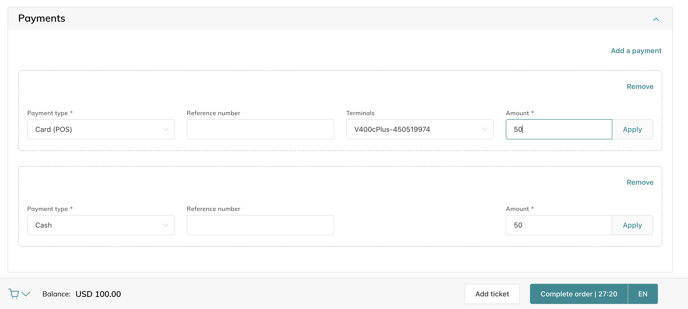
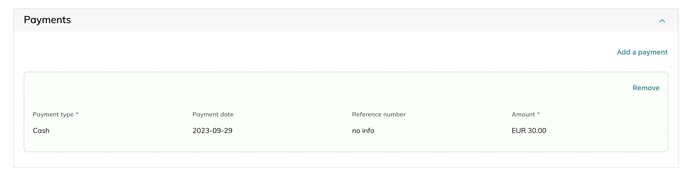
You have to click on "apply" to validate each payment. It will then display as a green box.
2.6 Overview section
You will see here the summary of the order.
2.7 Complete the order
- Once everything has been filled out, click on "Complete the order".
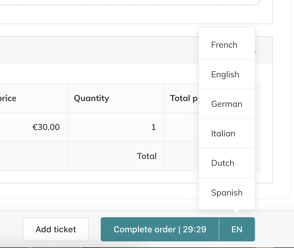
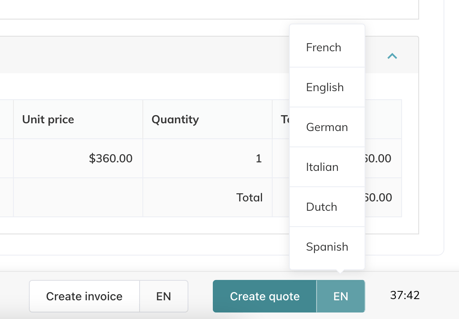
- You can modify the language of the email confirmation and the ticket if required by clicking on the language button
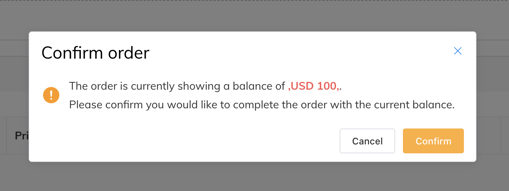
If you have not selected the full amount under the payment section and wish to complete the order with a balance, this pop-up will appear. Confirm, and the customer will be able to pay the order later on.
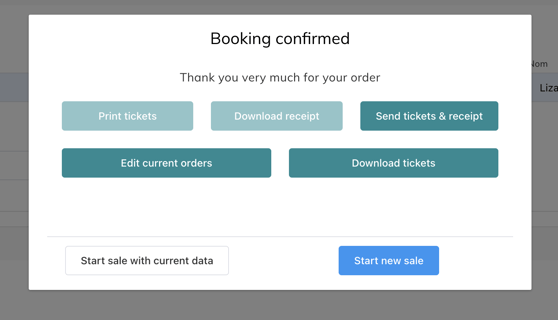
A pop-up window will be displayed after the sale is completed, giving you the option to:
- Print the tickets
- Download the tickets/receipt
- Send the tickets/receipt by email
- Edit the current order
- Start a new sale from scratch or with the current data
Go to "Orders" > "Completed orders" or "Pending orders" to find the orders you have created.
3. How to create a quote/invoice in the back-office
Most of the process is the same as detailed above in "create an order".
Here are the major differences:
- Select an existing customer or create a new one

- Under "booking information"
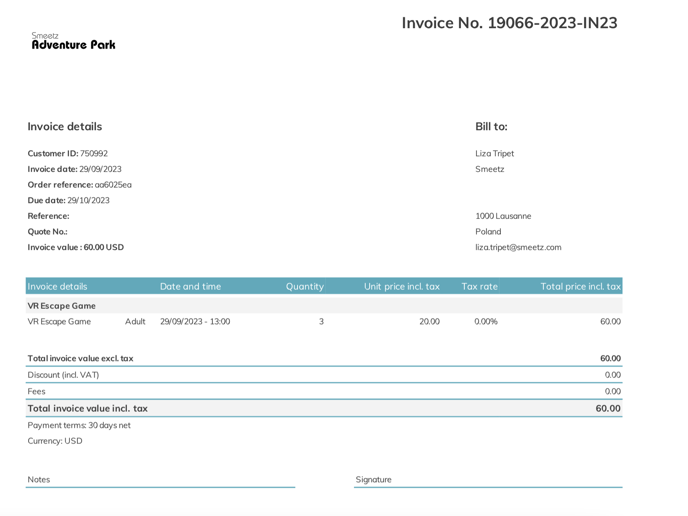
- Add the document reference: This reference will end up on the Quote and invoice page but also on the document directly to find it easily
- Add a document expiry date

- If you apply a payment method, you will only be able to create an invoice. To create a quote leave this section empty.
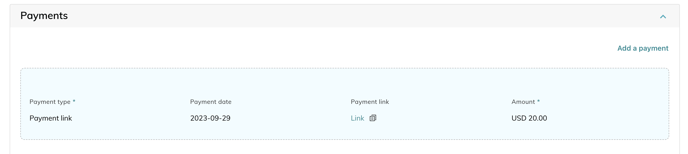
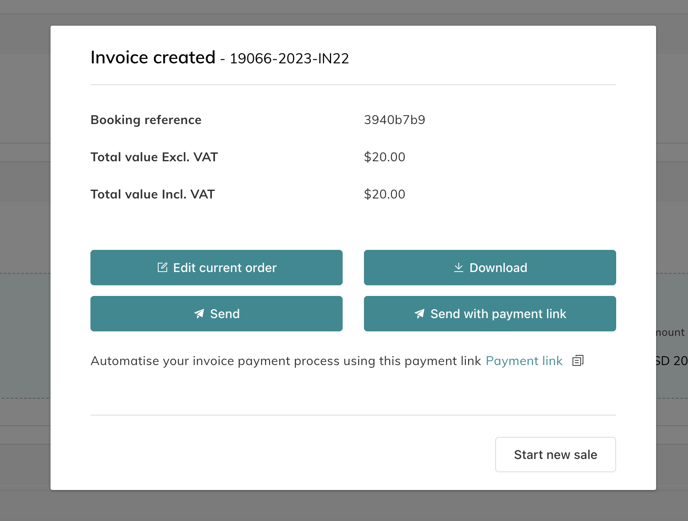
- For invoices you have a new payment option
- Payment link: automate the payment process by sending payment links that update live once the payment has been processed. Both the payment status and invoice status will be updated.
- Select the payment date, apply the payment and a payment link will be created.
- You can directly send this payment link to the customer who will fill out the credit card information
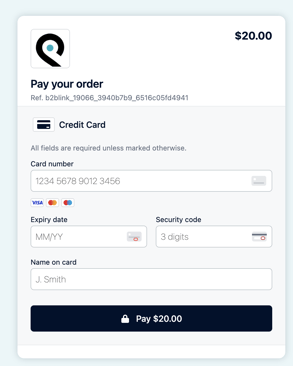
- Select the payment date, apply the payment and a payment link will be created.
- Payment link: automate the payment process by sending payment links that update live once the payment has been processed. Both the payment status and invoice status will be updated.
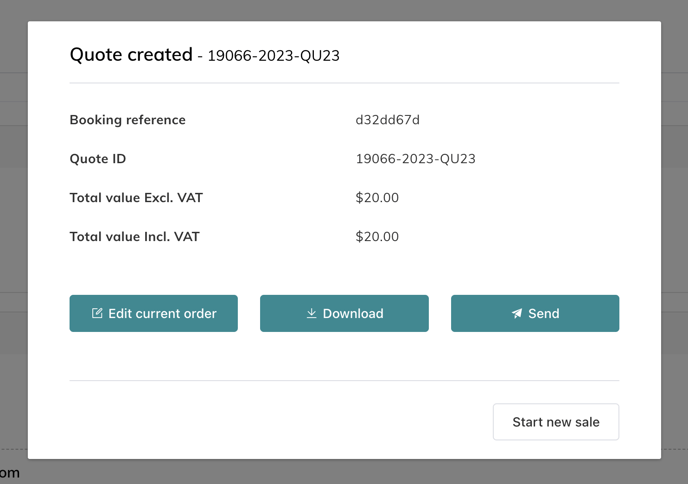
- Once everything has been filled out, click on "create quote" or "create invoice".
- You can modify the language of the email confirmation and the ticket if required by clicking on the language button
- After each creation, you will end up on the following pop-ups giving you the possibility to
- Edit the current order
- Download the document created
- Send the document
- Send with payment link (if you chose that payment method)
 |
 |
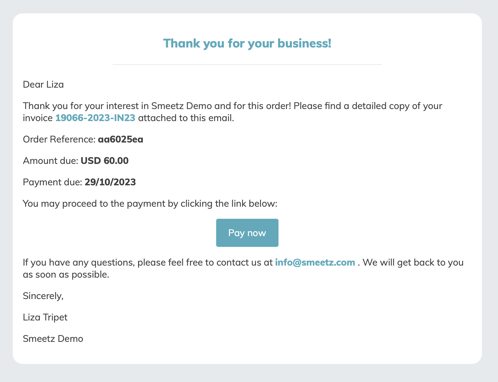
This is how your email looks like.
 |
 |
Go to "Orders" > "Quotes and Invoices" to find the documents you have created.