This article explains the process of bookings that need to be approved or denied by the organiser ("pending orders").
- Why create request-to-book tickets
- How to create request-to-book tickets
- How to approve or deny bookings
1. Why create request-to-book tickets
On your Smeetz account you have the option to create tickets that need to be accepted or declined, by you, once they have been booked by a customer.
The customer requests a booking slot and will only be charged once the booking has been accepted by you.
This type of ticket is beneficial for organisers who put a lot of emphasis on the management of attendees. For example:
- if the maximum capacity for attendees is limited
- if the event is full and has a waiting list
- if the event is only suitable for specific demographics (e.g. 18+)
- if the event can only take place during specific weather conditions, etc.
2. How to create request-to-book tickets
In order to create a ticket, which will need to be accepted by the organiser upon booking, please follow these steps:
- Create a product: Create > Activities
- Create a ticket: Products > Activities > Select the activity > Tickets > Create ticket > choose the desired ticket type
- Scroll down to Charge flow and confirmation > select "Should be confirmed and charged upon my confirmation"
- Or, if the ticket is already created, click on the ticket name and select "Charge flow" from the headings, then select "Should be confirmed and charged upon my confirmation". As below
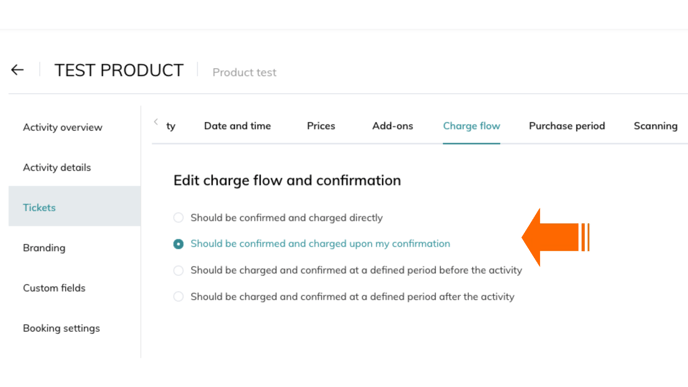
- Or, if the ticket is already created, click on the ticket name and select "Charge flow" from the headings, then select "Should be confirmed and charged upon my confirmation". As below
- Save and make the ticket ready available for sale: Activity details > Published > Ticketing status On
When creating the ticket, we recommend that you inform your customers that the booking will require your confirmation.
You can enter this information in the ticket description (practical information). This will help prevent potential confusion.
3. How to approve or deny bookings
Once a client has booked a ticket, they will receive an email where it specifies that the booking is pending. As the organiser, you will now have to accept or decline the booking.
To do this, follow the steps below:
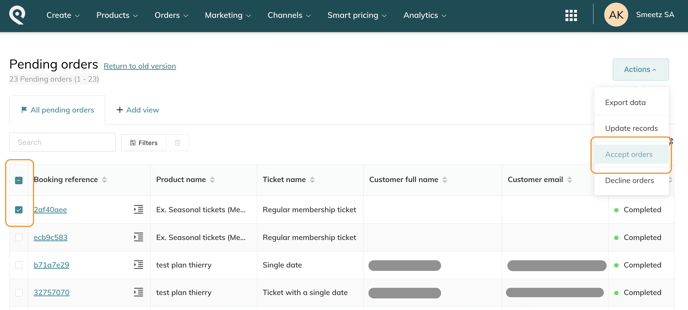
- Click on the tab Orders > Pending orders
- Select the attendees you wish to accept or decline by checking the box beside their order number. To accept/decline all attendees in one go, check the box in the header to select all.
- Then select "Actions" (on the right-hand side) and choose Accept or Decline orders
Once you have accepted a booking, the attendee and their booking will automatically appear in the attendee list. The customer will receive a confirmation email with their ticket and QR code.
If you decline their order, they will receive an email indicating that the order has not been accepted.