Discover how to setup your Smeetz Point of Sale (POS).
To sell from the POS, you have to install the POS App
If you only need to use the POS from the back-office, you can use the browser version (no receipts printed). Log into your Smeetz account: app.smeetz.com > Go to Channels > click on Point-of-sale > Web POS
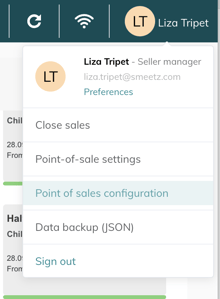
On your POS, by clicking on your "initials" in the top right, you can access the Point of Sale Settings.
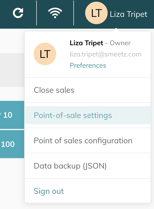
On the setting page, you can choose the following:
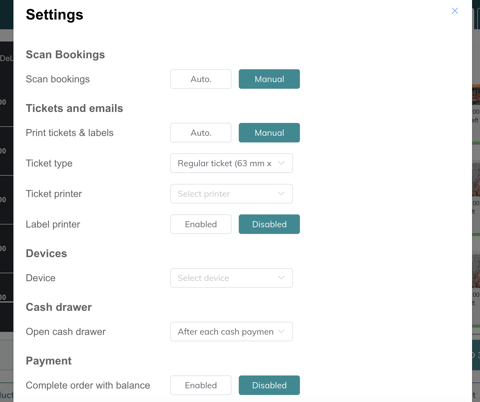
- Scan bookings
- Select if the sales on the POS are scanned automatically or manually (the tickets can be marked as scanned once sold)
-
Tickets and emails
-
Select if tickets and labels (stickers) are printed automatically or manually
-
Select the ticket type
- Regular ticket = printed thermal ticket
- Simplified receipt ticket = ticket printed on the receipt machine
-
Select the ticket printer
- Select if label printing is enable or disabled (if yes, select the printer)
-
- Device
- Select the device you are working on (it needs to be created beforehand on the back-office: process)
-
Cash drawer
- Select when the cash drawer opens
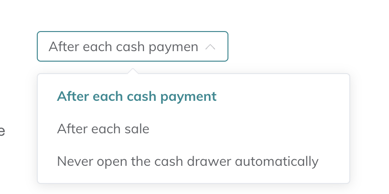
- Select when the cash drawer opens
- Payment
- Allow deposits or reservations with a balance
- If you enable "Complete order with balance" you will be able to complete a payment with a balance ie; deposit, or reservation without paying the tickets.
- Allow deposits or reservations with a balance
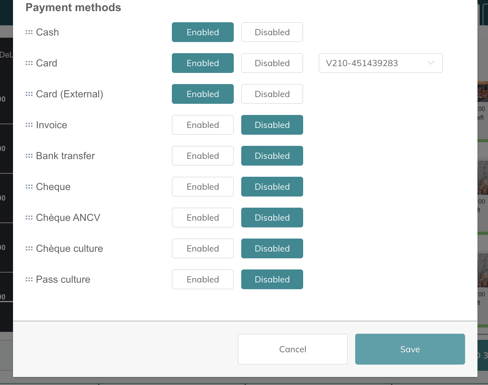
- Select payment methods
-
- Enable or disable the payment methods you wish to use (you can order them)
- Assign a payment terminal for card transactions (when using Adyen)
Printer Tips
If the setup is correct but you still cannot print, please check the following:
-
The PrintNode application must be active - if not, open it.
-
Check that the correct printer is connected.
-
Go to the Windows symbol (bottom left) > Settings > If "BTP - S80" is not selected > Select it.
Reload or change your configuration
When changes have been made in the back office, you can reload the current configuration with one click on the "reload icon".