This page explains how to install and connect the receipt printer to our Smeetz POS App on a Windows device.
1. Hardware installation
-
Open the receipt printer
-
Add a paper roll into the printer
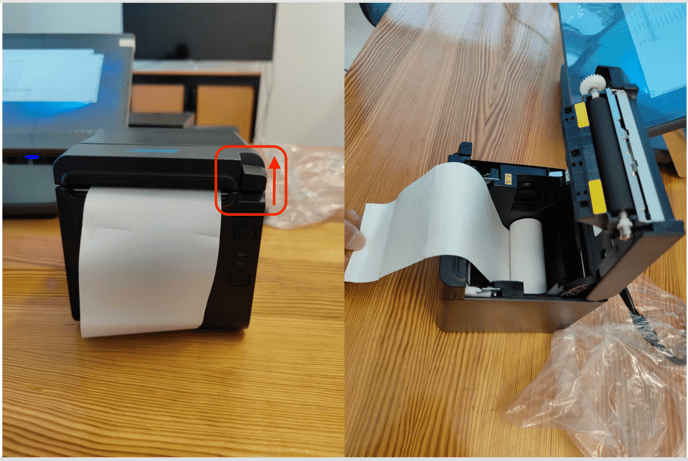
Paper type: thermal, continuous paper Paper width: 80mm Paper thickness: 0.06mm - 0.1mm Paper roll OD: Max. 83mm 
-
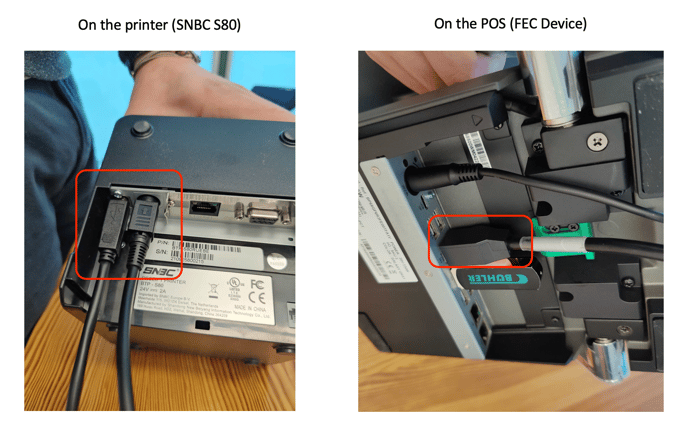
Connect the printer to the point of sales screen (POS screen)
-
You have 2 ways to connect the printer to the POS screen:
-
With 2 cables: 1 regular power supply + 1 USB cable to the POS (2 cables)
-
With 1 cable: Directly connected to the POS without power supply (1 special wire to purchase additionally)
-
-
- Switch it on with the button on the front side of the printer
- When the green light on, the printer works correctly
- Sometimes a red light blinks, but it is working correctly as well
2. Software installation
-
Prior to the installation, download the Smeetz receipt printer file from here (the file to launch is Setup.exe).
-
Add it to a USB key or have the link accessible from your email on the POS.
-
Follow the installation steps according to the video below
- The printer must be re-started after the installation of the driver
You need to make sure that the receipt printer is set up as your default printer in your device settings > Peripherals > Select "BTP-S80(180)" as default
3. Test your installation
To be able to print a receipt, you have to use the Smeetz POS App (download the app because you will not be able to print a receipt by accessing the POS from an internet browser).
-
Login to the POS app (not the browser)
-
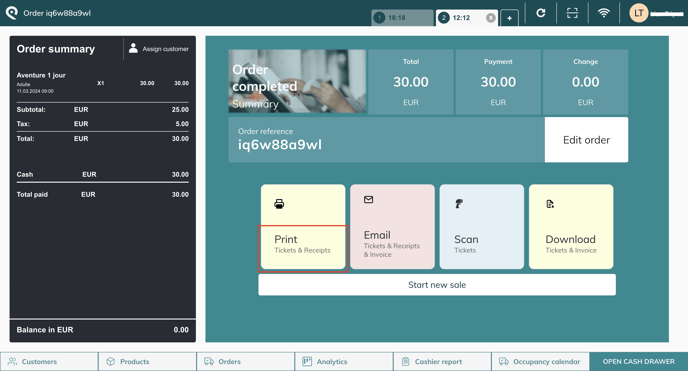
Make a simple order
-
Apply a cash payment
-
On the final page, click on “Print” & then “Only receipts”
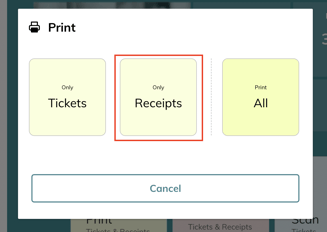
- A receipt should be printed and the cash drawer should open (as a reminder the cash drawer is directly connected to the receipt printer)
Note that you can change the printers settings on the POS if you want the receipt to be printed automatically or not.