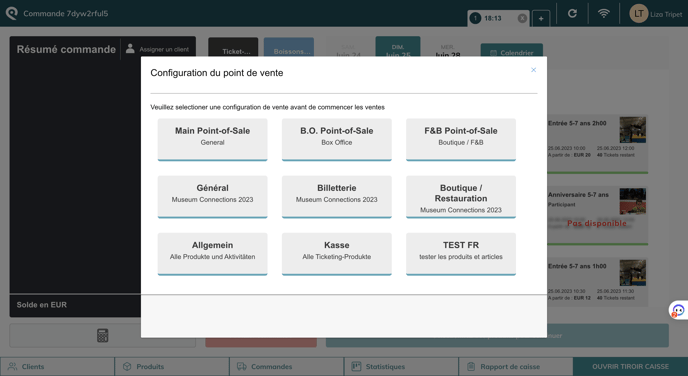
This article provides an overview of everything you need to know about the POS configuration.
- What is a POS configuration
- Types of POS configurations
- How to set up a POS configuration
- How to select a POS configuration
1. What is a POS configuration
A POS configuration refers to the way your POS is set up based on the products or services that you offer. Typically, this involves creating several configurations, each containing specific products or tickets.
The primary aim of POS configuration is to ensure that your employees have access to the products or services they need to perform their roles efficiently by assigning particular configurations to specific users.
Examples of configurations that you can create:
- Box office: sell tickets
- Restaurant: sell F&B
- Boutique: sell retail
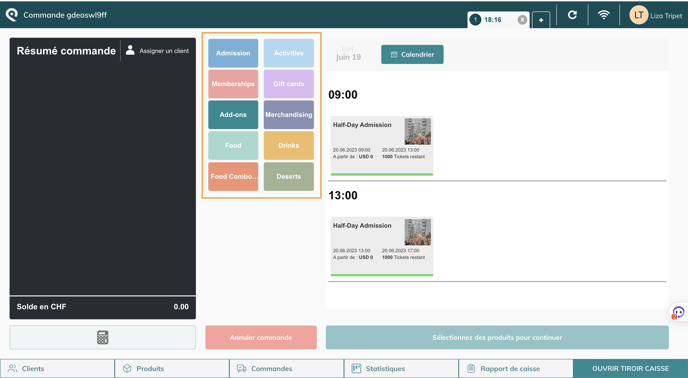
The boxes in the middle will change based on the POS configuration chosen.
2. Types of POS configurations
- Location-based configurations: If your business has multiple locations, create configurations specific to each location based on the products or services offered at that location.
- Seasonal configurations: Create configurations that are specific to different seasons, holidays or promotions. For example, you might have a holiday configuration with products that are popular during the holiday season.
- Category-based configurations: Organize your products into categories and create configurations based on those categories. For instance, you might have a configuration for clothing, a configuration for electronics, and a configuration for food items, etc.
3. How to set up a POS configuration
1. Create sales collections
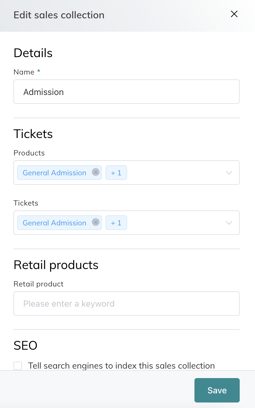
A POS configuration is created using sales collection (ticket groups). You need to make sure you have the right products in your sales collection.
-
Create all products/tickets/prices.
-
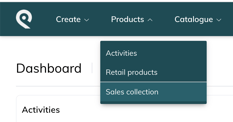
Go to Sales collections
-
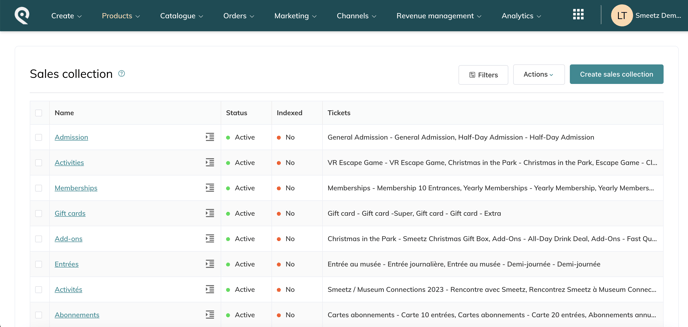
Create all sales collections and include your products/tickets or retail items.
-
Each sales collection will be a button (folder) in the centre bar (in the example below).
-
Be careful when you name the sales collection, as it will be the name of the button on your POS.
-

Read this article to know more about sales collections
- What is a sales collection
- How to create a sales collections
- How to link your sales collection to your team members
-
How to disable sales collections
2. Create POS configurations
- To create your POS configuration: go to Channels > Point-of-Sale > Point-of-Sale configurations
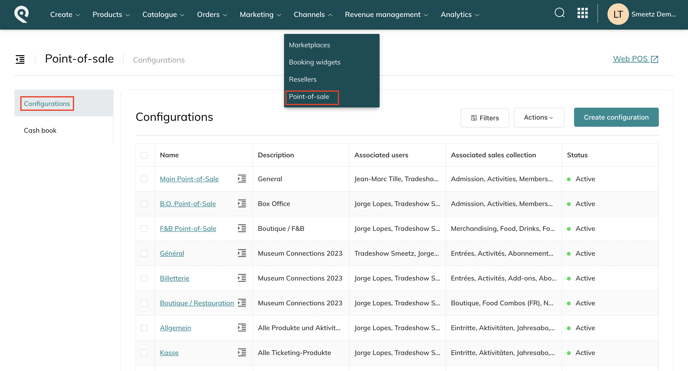
- Click on "Create configuration".
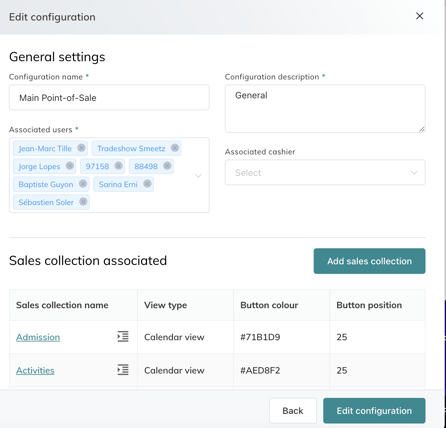
Here is the information to set up:
- Add the name of the configuration
- Add the description of the configuration
- Select the associated users (each new user needs to be added to the correct configuration)
- Select the associated cashier (POS)
- Add all the sale collections you want to appear in this configuration
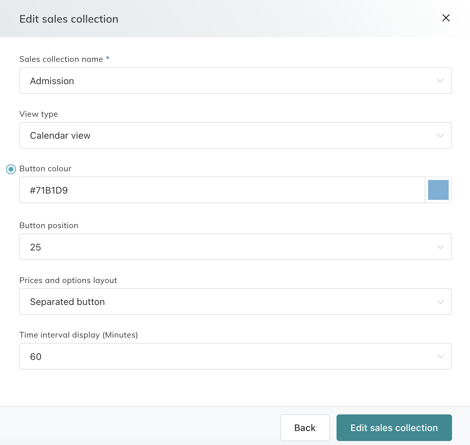
- Select the sales collection
- Select the view type (right side of the POS)
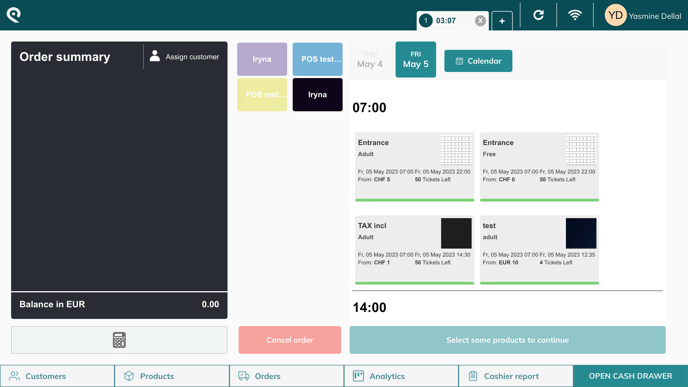
- Calendar view: Sliding calendar at the top - sorted by time slot.
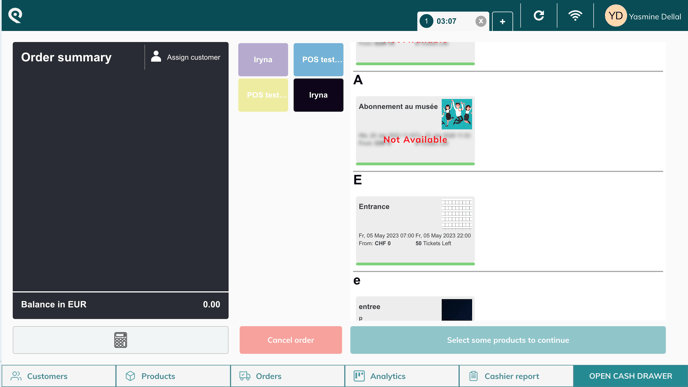
- Alphabetical view: Show only the time slot of the day - sorted from A to Z.
- Add the button colour: colour of the categories at the centre of the POS (try to put something dark as the font is white)
- Select the button position: it will order the sales collection (from top to bottom)
- Select the prices and options layout:
- Pop-up window
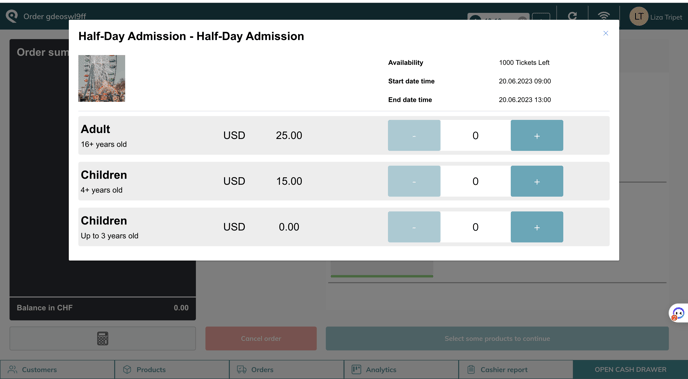
- Separate buttons
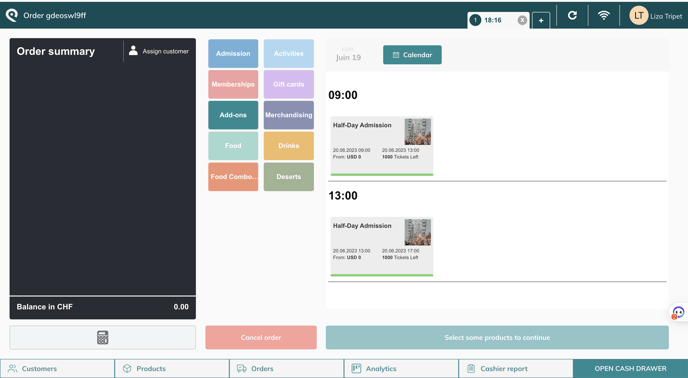
- Pop-up window
- Calendar view: Sliding calendar at the top - sorted by time slot.
Remember that:
- A point of sale configuration is linked to specific users.
- A point of sale configuration can contain multiple sales collections.
4. How to select a POS configuration
At each connection on the POS, you will have to load the right configuration to start selling. You can choose the configuration from the point of sale by clicking on your name (top right) > Point of Sale Configuration.
