Setup your equipment to start sales

This article explains how to set up the sales material on site.

  1. Thermal printer Zebra ZD420
  2. Computer / tablet
  3. 4G Wifi terminal

1. Thermal printer - Zebra ZD420

Carton Content

  • Thermal printer
  • Power cord (2-part)
  • USB cable

Printer installation

  1. Connect the printer to a computer using the USB cable
  2. Check that there is sufficient color and paper in the printer. To insert the paper make sure that:
    1. The black mark needs to face down

    2. The black mark needs to be aligned with the yellow sensor
    3. Place the ticket so that the black mark is towards you, (right before the opening) not towards the back of the machine 
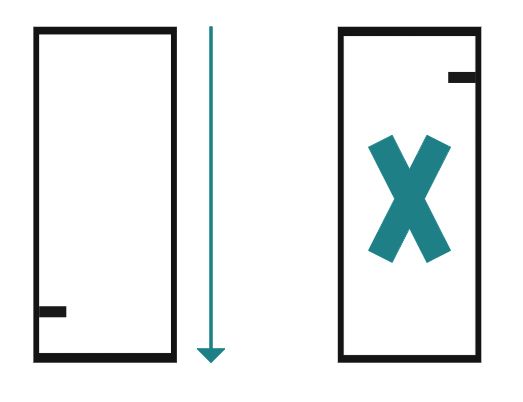
      Screenshot 2022-08-12 at 13.48.30
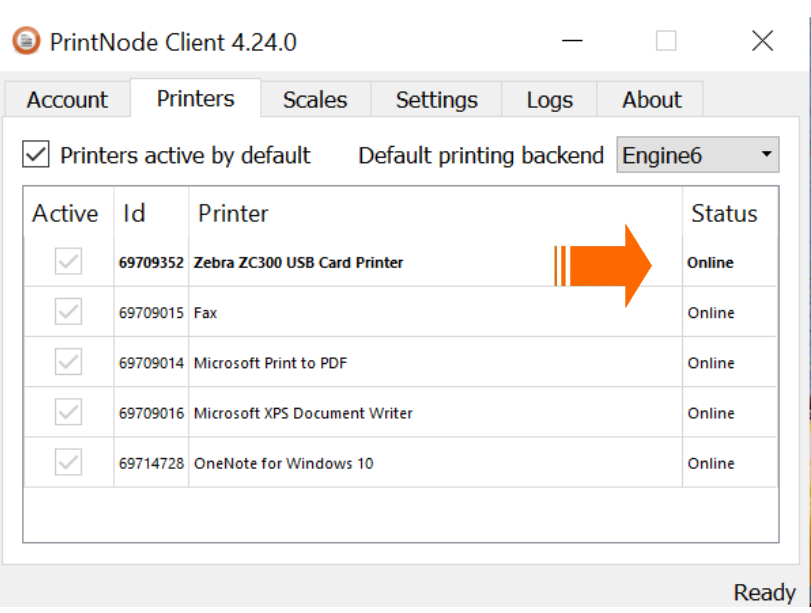
    1. Check that the printer is correctly connected to your computer on PrintNode. Make sure that the status is "online".
    2. Use Chrome to login to your Smeetz for Business account and go on Create > Create a sale
      POS_EN_1
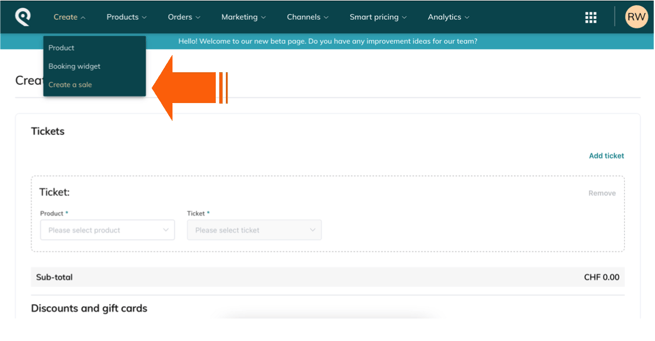
    3. Select the printer on the POS > show filters > Printer > Apply (if it doesn't save, simply select some tickets and products in the filter and apply again)  

If PrintNode shows offline, you can connect the printer by going on Windows Settings > search for Printers & Scanners > Refresh > Add device

Loading the thermal rolls

  1. Open the printer cover
  2. Move the two orange posts inside the printer apart
  3. Place the paper between the two orange posts
  4. Let part of the thermal paper protrude outside the printer
  5. Close the printer cover
  6. Press the pause button


Uninstalling the printer

  1. Remove the thermal paper from the printer
  2. Remove the cable from the power supply
  3. Place the printer inside the box
  4. Place the power cord inside the box
  5. Close the box with adhesive tape

2. Computer / tablet

Carton Contents

  • Computer or tablet
  • Power cord

Installation of the computer / tablet

  1. Connect the computer/tablet to the power supply
  2. Connect the computer/tablet to WiFi
  3. Select the Smeetz user session
  4. Enter the password you were previously given
  5. Launch the icon on the desktop

Uninstalling the computer / tablet

  1. Remove the cable from the power supply
  2. Place the computer/tablet inside the box
  3. Place the power cord inside the box
  4. Close the box with adhesive tape

3. 4G WiFi terminal

Carton Contents

  • 4G WiFi terminal
  • Power cord
  • (Cable ethernet)

Installation of the 4G WiFi terminal

  1. Connect the 4G WiFi terminal to the power supply
  2. Switch on the terminal

Uninstalling the 4G WiFi terminal

  1. Remove the cable from the power supply
  2. Place the 4G WiFi terminal inside the box
  3. Place the power cord inside the box
  4. Close the box with adhesive tape

Problem solving

  1. If there is a problem connecting the 4G WiFi terminal to the mobile network, press the two buttons on the back of the terminal simultaneously to reset it. After the icons have blinked, all icons should be illuminated.
  2. The code to access WiFi is located under the 4G WiFi terminal