This page details the best use of our B2B calendars and how you can benefit the most from them.
On Smeetz, you have access to 4 different types of calendars: Date view, Daily, Weekly and Monthly. Those views can help you see your attendance for any particular time slot or to directly create bookings for your activities.
To make sure that you have access to what you need we will start by having a look at the settings of the calendars.
1. Settings of the calendars
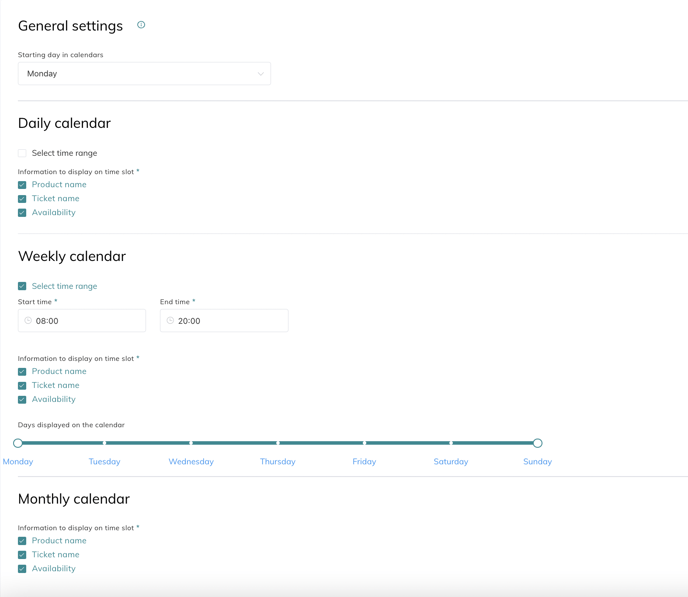
You will find the settings at the bottom of the list of available calendars.
- General Settings: Here you can select when your working week starts for all the calendars (except the date view).
- Daily Calendar:
- Click on "Select time range" to define the start and end time of your day. This is helpful to only see the times that you are interested in.
- You can also choose to display the Product name, Ticket name or availability on your timeslots.
- Weekly Calendar:
- Same as for the daily calendar, you can select here the visible time range and which information you want to display on your timeslots
- You can also choose which days you want to be displayed on the calendar.
- Monthly Calendar:
- Here, as the calendar displays the entire month, you can only select which information you want to display on your timeslots.
Note: Remember to press "Save" after adjusting your settings.
2. Date view
First, note here the presence of the filters and tabs for the different views. Indeed, as it's the case for all our lists, you can create custom views based on your preferences. You can find more details about this here.
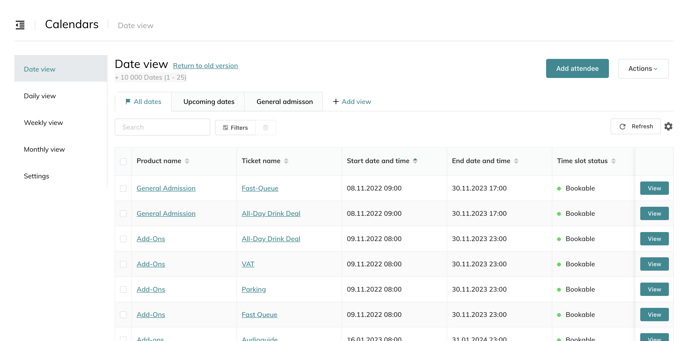
The date view provides the following information for each timeslot:
- The product and ticket name
- The start/end date and time
- The timeslot status
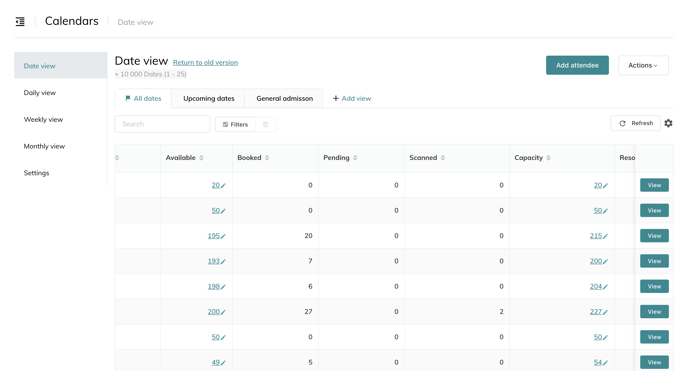
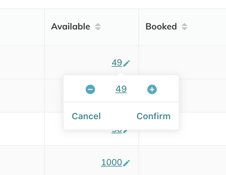
- The amount of available tickets (it is possible to change the number of places available by clicking on the pen next to the number)
- The amount of booked tickets
- The amount of pending tickets
- The amount of scanned tickets
- The total capacity for the timeslot (it is possible to change the capacity by clicking on the pen next to the number)
- Whether the timeslot is available onsite or online
- The revenue generated by the sale of the activity
- And some more information
On this page, you can also:
- Add an attendee to an activity by clicking on "Add attendee". This redirects you to the create a sale page (instructions for 'create a sale').
- Select timeslots and click on "Actions" to export the data to Excel or bulk change capacity.
- Change the number of tickets available by clicking on the pen under the "available" column. Use the - or + to decrease or increase the number of available tickets, and then click "confirm".
- Change the capacity of the timeslot by clicking on the pen under the "capacity" column. Use the - or + to decrease or increase the number of available tickets, and then click "confirm".
- Access the attendees of an activity (by time slot, if applicable) by clicking on "view". You will be redirected to the "attendee list" page with the selection of attendees.
3. Daily view
The Daily view will allow you to see all your activities for the day in the form of a calendar.
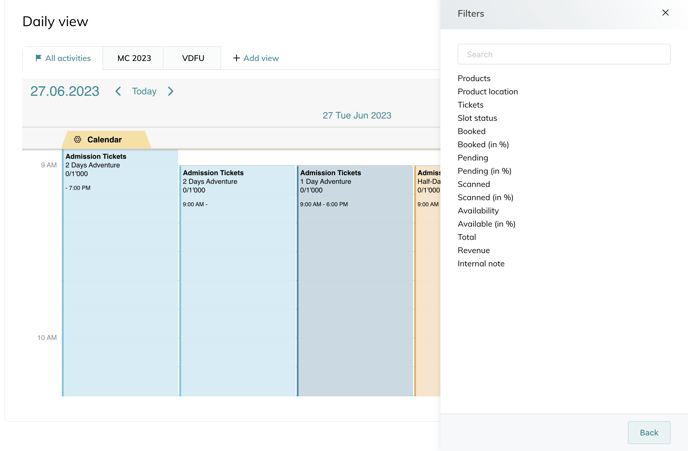
Here you can use the filters to select which activity you want to see. You should have views for each activity type. You can filter the activities and time slots by clicking on the cog wheel next to the calendar's name (By default: Calendar).
Note also that the daily view allows you to add up to 5 calendars next to each other with different filters for each. To do so, simply click on "Add calendar".
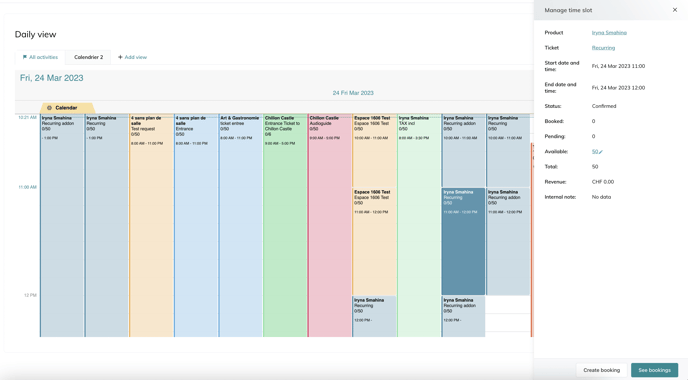
By clicking on an activity, you will access the following details:
- Product Name
- Ticket Name
- Stat and End time
- Status of the timeslot
- Number of booked tickets
- Number of pending tickets
- Number of scanned tickets
- Number of available tickets
- Total number of tickets
- Revenue generated
- You can leave a note
By clicking on an activity on the calendar, you can take the following actions: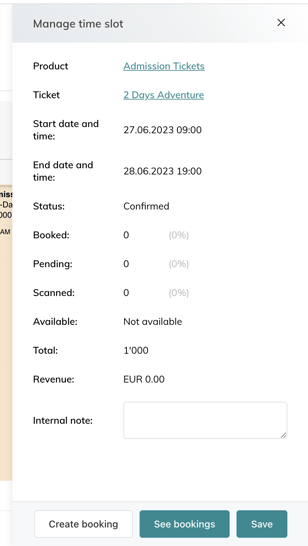
- You can directly "create a booking" for this timeslot, it will redirect to "create a sale" with prefilled data for the selected timeslot
- To see the attendee list for this activity, you can click on "See bookings".
By clicking on the calendar, you can take the following actions: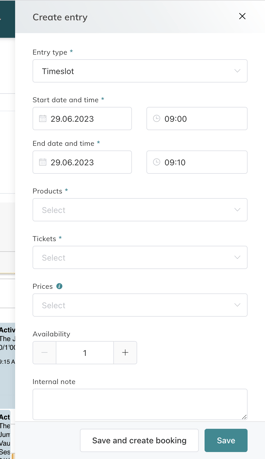
- You can directly create a new booking for a specific Product. As soon as you have added all this information, you can create a booking from the button “Save & Create booking”. This action will bring you to "Create a sale" with the selected product and time slot.
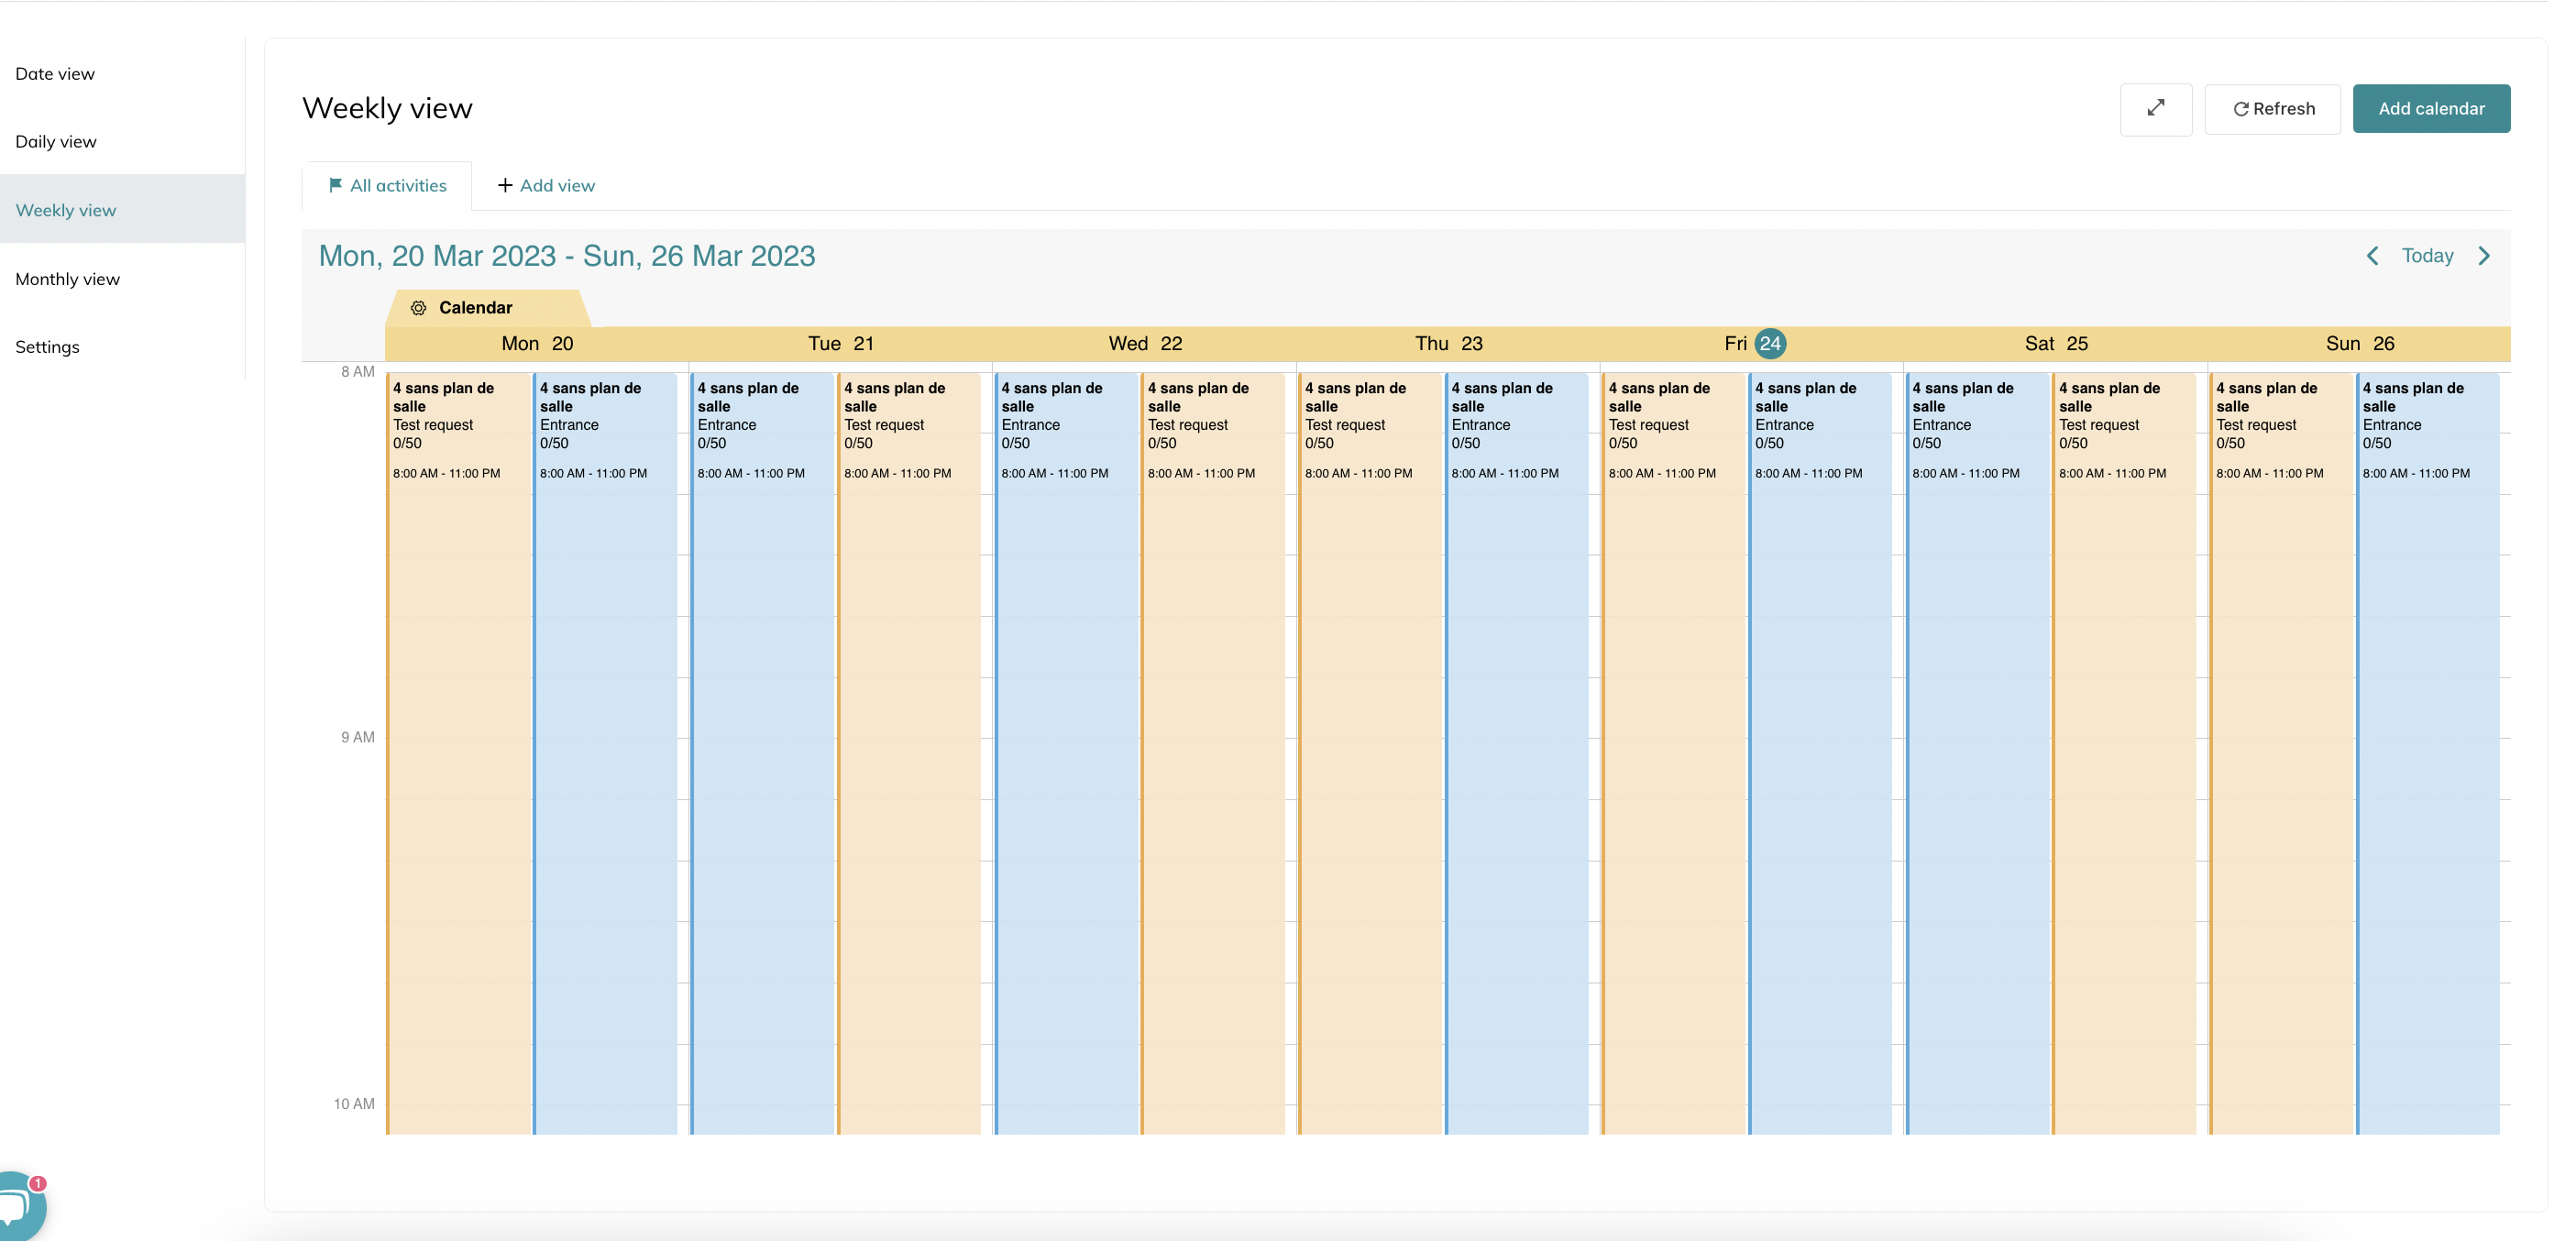
4. Weekly view
The weekly view allows you to see your whole week at a glance. You will find here the same features as the daily view.
5. Monthly view
The monthly view offers the same possibilities as the daily and weekly views. However, in this view, you can't opt-in to have several calendars next to each other.
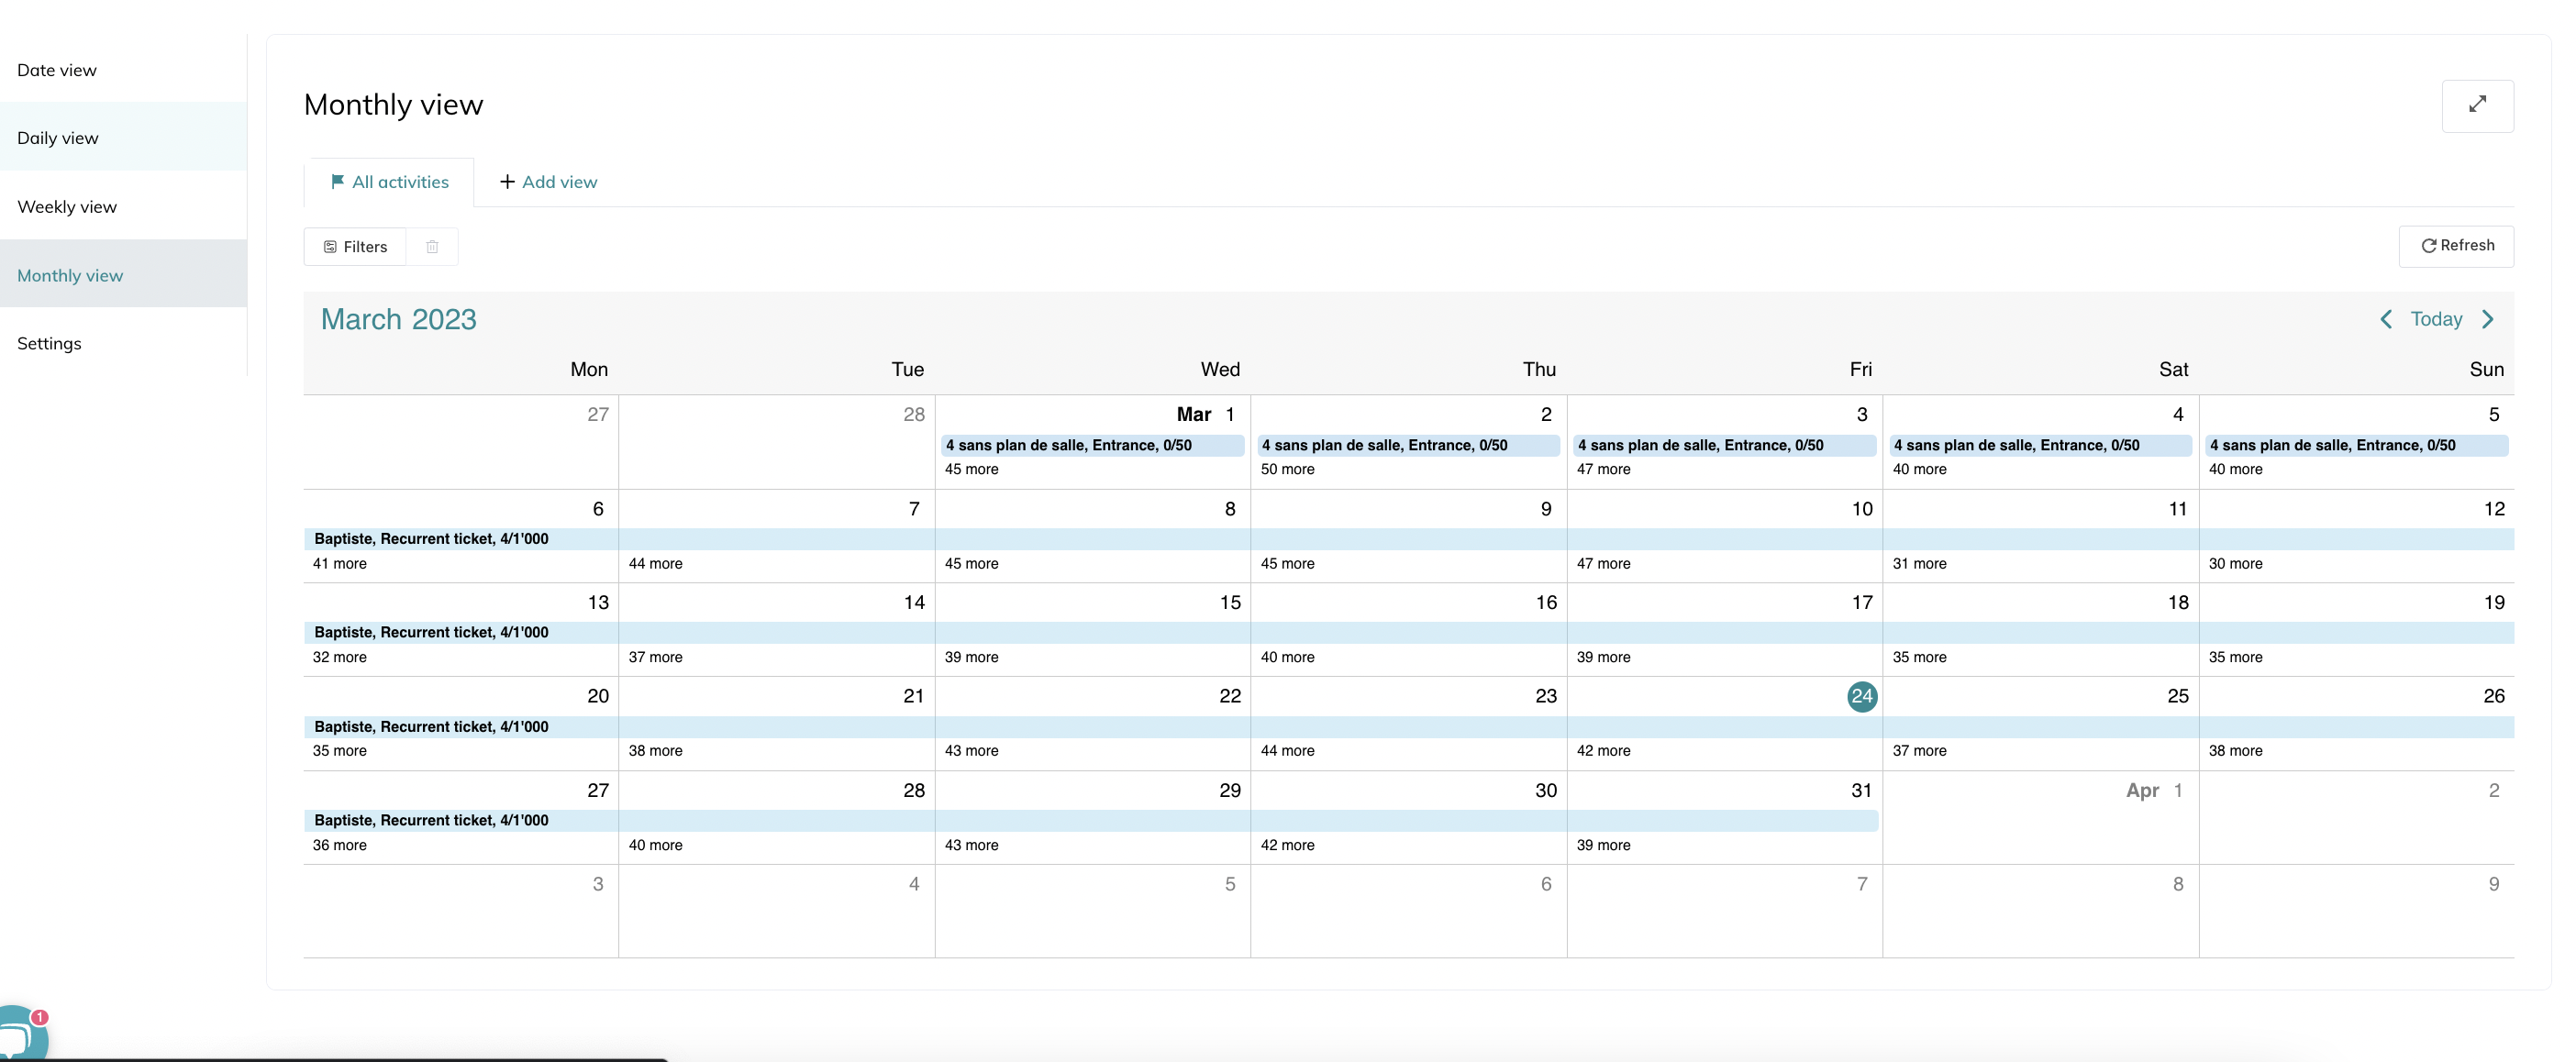
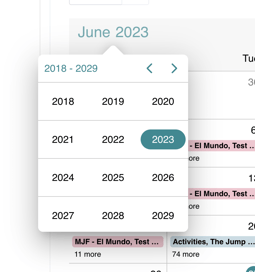
To change the month, simply click on the name of the month, this will open a list of months, allowing you to easily change which month you are in.